We started to build the basic structure of our Alebrije. Students were asked to concentrate on making the basic shapes that are needed for their creatures and add details later. Students are using newspaper and minimal amounts of masking tape. You do not need a lot of masking tape. Later when the papier mache layers go on, the sculpture will be solid.
Visual Arts 8
Welcome to Art 8
This website is to assist you with Art rotation in your CSI course. CSI includes Art 8, Drama 8, Information Technology 8, and Woodworking 8. Use this website to keep track of assignments and information provided in class. If you have any questions please feel free to E-Mail me at ranasuriya_s@sd36.bc.ca.
Tuesday, October 4, 2011
Friday, September 30, 2011
Alibrije day ONE!
Today we started on our Alibrije.
We went over what it is and how we are going to create our own.
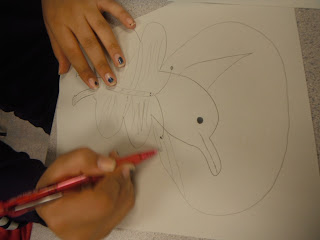
Here are some examples of works in progress (sketches).
We went over what it is and how we are going to create our own.
Here are some examples of works in progress (sketches).
Tuesday, September 27, 2011
Alabrije!!
Next up is a paper-mache unit on Alabrije.
Here is a powerpoint with some more information on Alabrije and what the project will be about!
Here is a powerpoint with some more information on Alabrije and what the project will be about!
Water Color Final Project
The Watercolor Final project is to find a magazine or other color image of a landscape and make a replica of it. The point is to show you can color match (mix colors) using your primary colors (red, blue, yellow), black, and white.
Here are some examples that are still in progress:

Here are some that are complete (from Gr 8 and 10 classes):


Here are some examples that are still in progress:

Here are some that are complete (from Gr 8 and 10 classes):


Friday, September 23, 2011
Watercolor technique sheets
Next we looked at shading with water color.
Here is the blank handout of shapes.
Here is what is should look like when it's done:
Here is the blank handout of shapes.
Here is what is should look like when it's done:
Shading with watercolor works the opposite way, rather than starting with your darkest, you start with the lightest and slowly add and blend the dark colors.
Then we looked at some specific watercolor techniques:Wet on Dry, Dry Brush, Crayon Resist, Wet on Wet, Gradient, Stippling, Salt Addition, and Brush Lines!
Here is the blank for Water Color Techniques
Watercolors!
First up for water colors is a color wheel
Here is the blank handout.
And here is what it looks like completed (By: Nikhil)
Here is the blank handout.
And here is what it looks like completed (By: Nikhil)
Red, Blue, and Yellow are your PRIMARY COLORS.
By mixing these you get your SECONDARY COLORS: Purple, Green, and Orange
By adding more of the primary colors to the secondary colors you get: Red Orange, Yellow Orange, Red Purple, Blue Purple, Yellow Green, and Blue Green
Drawing Unit Final Project
For the final project for this unit we made macaroni/pasta sculptures! (FUN!)
They were spray painted white to give you more to work with for shading.
Then you were supposed to draw the contour then shade in the pasta.
To make this a bit easier for grade 8, the instructions were to make the cardboard the pasta was glued down to your darkest shade, and everything else gets lighter and lighter as it gets higher and higher off the cardboard.
Here are some good examples of this project:
Ethan:
Simrin:
Kirsten:
This is the final item for your portfolio for this unit. Next up, WATERCOLORS! :)
Subscribe to:
Comments (Atom)


